Contact Us
STATEN ISLAND FIBERAMA

Choosing Lead Stained Glass Windows is not only a matter of color or style. The right choice should suit the room, the building, and the light it receives. Start by noticing how daylight moves across the glass during different hours. A deep blue panel may look calm at noon, then feel dim on a cloudy afternoon. Record window dimensions, direction, privacy needs, and nearby furniture before comparing designs. Small details matter. So does restraint. A crowded pattern can compete with a room’s trim, while a quiet border may frame it.
Look closely at glass texture, color consistency, lead lines, and the maker’s examples of completed work. Ask how the design will be supported, installed, cleaned, and maintained over time. A qualified stained-glass professional can explain suitable construction for the opening and its exposure. For larger or older windows, have the surrounding frame and support assessed as well. Do not assume a photograph shows the true color; request samples or view work in natural light. There is no universally best design. Even careful plans can miss how a room feels once the window is in place. That uncertainty deserves attention, not sales pressure. This guide compares practical choices, from traditional motifs to simpler contemporary panels, without treating appearance as the only measure. Its aim is a window that feels considered, suits its setting, and remains serviceable.
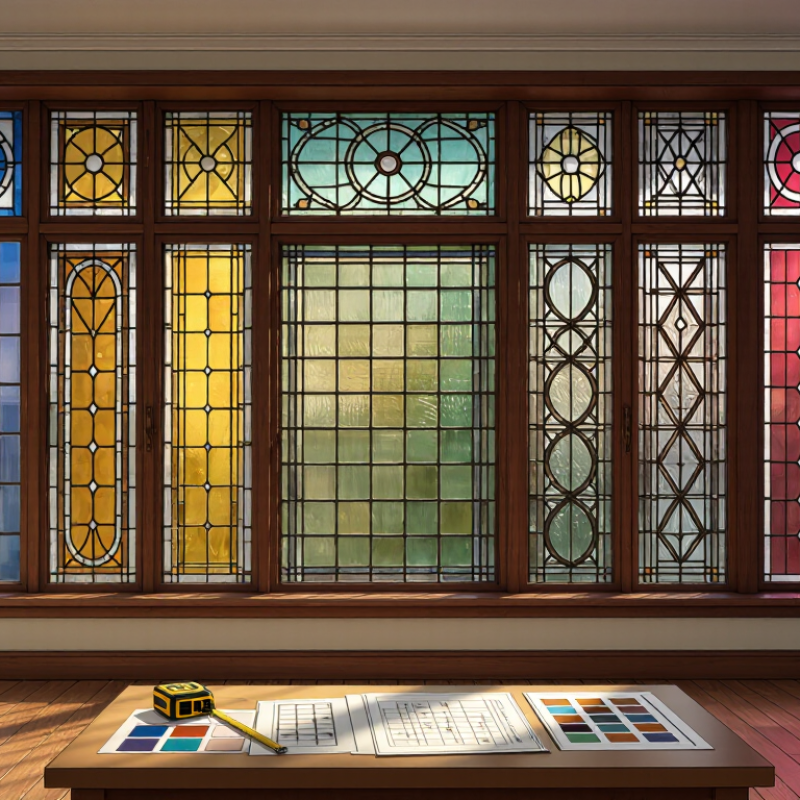
How to Choose Lead Stained Glass Windows
Understanding the Structure of Leaded Stained Glass Windows
A leaded stained glass window is built from separate pieces of colored or clear glass, held together by narrow lead channels called cames. Each came has a groove that grips the glass edge, while soldered joints connect the channels at their crossings. A sturdy perimeter support helps the panel keep its shape, especially in larger windows. That matters. The glass itself may have ripples, bubbles, or slight color shifts; these details can make daylight feel softer and less uniform.
When choosing a window, look closely at the lead lines, solder joints, and frame. Cames should sit snugly against the glass, without obvious gaps or loose sections. Ask how the panel will be supported and installed, since size and location affect structural needs. A window exposed to strong wind or frequent vibration may require additional reinforcement. More reinforcement is not always better; it can change the appearance and should suit the design. Small irregularities may be part of the craft, but damage or movement deserves careful assessment by a qualified stained-glass professional.
Tips: View a sample in daylight, not only under indoor lights. Ask what maintenance the panel may need, and request an installation plan. A little unevenness can be charming. It can also make matching later repairs harder.
Understanding the Structure of Leaded Stained Glass Windows
Lead came holds the glass pieces together and creates the visible lines in a panel. These example face widths—converted from common fractional-inch sizes—illustrate options, not a universal standard. Wider came creates stronger visual lines; the right choice depends on the panel design and its support needs. Face width is not the same as the channel size that holds the glass.
Before choosing a leaded stained glass window, decide what it must do: provide privacy, soften glare, or become the room’s focal point. A bathroom panel may need dense textures that obscure views, while an entryway can use clearer sections to preserve daylight. Light changes. Note the room’s orientation and observe the opening in morning and afternoon; colors can look very different as sunlight shifts.
Location also affects comfort. The U.S. Department of Energy’s Energy Saver guidance estimates that heat gain and loss through windows account for about 25–30% of residential heating and cooling energy use. That figure covers windows generally, not stained glass alone. Still, it is a reason to discuss insulation, weather sealing, and any protective glazing with a qualified installer. A decorative panel should suit the existing window assembly, not just the frame.
Measure the visible opening, frame depth, and nearby trim before settling on size. Record measurements at several points; older openings are not always square. Measure twice. Consider sightlines from standing and seated positions, plus room for handles or curtains. I would not assume a larger panel always feels brighter: dense lead lines and dark glass can reduce the open impression. A paper template can help test the design at full scale before fabrication.
Choosing lead stained glass windows starts with how much light you want to keep. Clear cathedral glass is transparent and lets rooms stay bright, while opalescent glass softens views with milky color. Textured glass can blur a neighboring building or a busy street. Hold samples near the actual window, not just under showroom lights. Light changes everything.
Color affects both mood and visibility. Pale amber and soft green often cast a gentle tint across a room, while deep ruby or cobalt can make a small space feel darker. Try a sample at different times of day. Small samples help, though they cannot show the full effect of a large panel. I learned that the hard way: a color that looked quiet on a desk felt much stronger against a sunny window.
Design style should suit the building and the view. Geometric patterns with straight lead lines can complement simple interiors; botanical curves may feel more at home in older rooms. Wider lead lines create a bold grid, while finer lines allow more glass detail, but intricate patterns need careful planning. Ask a qualified stained-glass professional about panel support, cleaning, and installation before choosing a design. Even a beautiful pattern can feel too busy once it fills the whole window.
Lead came holds individual glass pieces in a flexible metal framework. Check whether the lines look even without seeming mechanically identical. At intersections, solder should form secure, tidy joints, not bulky blobs or thin gaps. Gently observe the panel for bowing, loose glass, or rattling; do not press hard on fragile sections. A small irregularity may reflect handwork, but movement can signal a repair need.
Craftsmanship also appears in the details. Glass edges should sit steadily within the came, with no sharp chips exposed at the seams. Look for clean soldering and consistent support around the panel’s perimeter. If you can inspect the window in daylight, notice how colors and textures meet; awkward cuts can interrupt a pattern. A neat surface is not proof of sound construction, though. Ask how the panel is supported and whether past repairs are documented.
Durability depends on installation and care as much as appearance. Lead can soften and shift over time, especially in a large panel exposed to vibration or temperature changes. Check for cracked solder, sagging, and gaps in the frame, then ask a qualified stained-glass conservator to assess concerns. No quick check is perfect. I would avoid treating a little waviness as either automatic failure or harmless charm; context matters. A protective outer glazing may help in some settings, but it needs proper ventilation and design.
Choosing a supplier starts with evidence, not polished photographs. Ask for close-up images of solder joints, came profiles, edge details, and completed installations. Request a written survey covering panel dimensions, frame condition, support, weather exposure, and access for future repairs. The National Park Service’s Preservation Brief 33 recommends assessing stained-glass condition before choosing a treatment. A supplier who proposes replacement before inspecting the window deserves careful questions. Small details matter.
Tips: Ask who measures, fabricates, installs, and handles repairs. Confirm that the installer has experience with stained glass and the existing frame. Get drawings, material specifications, a schedule, and warranty terms in writing. Keep a dated photo record before work begins.
Plan installation around the building, not just the panel. Check whether the frame needs repair, how the glass will be supported, and whether temporary protection is needed during construction. The U.S. Department of Energy estimates that windows account for about 25–30% of residential heating and cooling energy use; that figure covers windows broadly, not stained glass alone. Discuss drafts and condensation with a qualified professional, without assuming the historic panel itself should be sealed or replaced. After installation, schedule visual checks for loose putty, cracked glass, corrosion, or water marks. A maintenance plan can be simple, but it should name who inspects the window and when. In practice, even a careful plan may miss a small change, so record what you see.
| Planning area | What to evaluate | Questions to ask or details to confirm | Practical guidance |
|---|---|---|---|
| Design and purpose | Window location, privacy, light transmission, appearance, and whether the design is new or a restoration. | Will the glass be viewed from indoors, outdoors, or both? Should the design provide privacy while preserving daylight? | Review full-size or accurately scaled design drawings, glass samples, and the proposed colour arrangement before production. |
| Supplier experience | Relevant experience with leaded glass, similar project sizes, restoration work, and installation conditions. | Can the supplier provide examples of comparable completed work and explain who will design, fabricate, and install the panels? | Check references and written project examples. For historic or protected buildings, confirm experience with the applicable conservation requirements. |
| Materials and workmanship | Glass type, lead came profile, soldered joints, panel construction, and finishing details. | Which glass and came materials are proposed? How will panel edges, joints, and any reinforcing bars be finished? | Materials and construction should suit the panel size, location, exposure, and structural support. Ask for specifications rather than relying on appearance alone. |
| Measurements and survey | Opening dimensions, frame condition, squareness, access, and existing glazing details. | Who will take final measurements, and will the frame be inspected before fabrication begins? | Have the opening measured on site. Record width and height at multiple points, since older openings may not be perfectly square. |
| Quotation and scope | Design, fabrication, delivery, installation, access equipment, removal of existing glass, and disposal. | Does the quotation list inclusions, exclusions, payment stages, estimated lead time, and how changes are priced? | Compare itemised scopes, not just total prices. Confirm responsibility for repairs to frames or surrounding finishes. |
| Installation method | How the stained glass will be supported and protected from weather, impact, and movement. | Will the panel be installed in an existing opening, behind protective glazing, or as part of a purpose-designed glazing assembly? | Agree the support and weatherproofing details before fabrication. Protective glazing should be designed to manage ventilation, drainage, and condensation risk. |
| Building and safety checks | Structural condition, exposure to wind and impact, safe access, and relevant local building requirements. | Does the opening need frame repairs or specialist assessment? Who is responsible for permits and site safety arrangements? | Large, elevated, or exposed installations may need a qualified professional to assess support and glazing requirements. Do not assume a decorative panel can carry structural loads. |
| Schedule and site preparation | Design approval, production time, delivery, installation access, and protection of the surrounding area. | What is the expected sequence, and will the opening need temporary covering during installation? | Set dates only after measurements and design are approved. Plan for safe access and protection from weather while the opening is exposed. |
| Warranty and records | Written warranty terms, exclusions, care instructions, and documentation of materials and design. | What workmanship or material issues are covered, for how long, and how should a concern be reported? | Keep the final drawings, invoice, care guidance, and installation details with the building records. |
| Routine maintenance | Glass condition, lead came, soldered joints, putty or sealant, frame, and signs of water entry. | What inspection interval is recommended for this location, and who should carry out repairs? | Inspect at least annually and after severe weather. Look for cracked glass, loose or bowed sections, failed joints, corrosion, and water ingress. |
| Cleaning and repair | Safe cleaning methods and prompt assessment of damage or movement. | Are there specific care instructions for the selected glass, finishes, and surrounding frame? | Use a soft cloth and mild soapy water; avoid abrasive pads and harsh chemicals. Have damaged or unstable panels assessed by a qualified stained-glass specialist. |
| Older panels and lead safety | Potential lead exposure when existing lead came, solder, paint, or putty is disturbed. | Who will assess and control dust or debris if an existing panel or frame must be removed or repaired? | Do not sand, grind, or dismantle suspect materials yourself. Use suitable professional controls and follow local health and waste-disposal requirements. |
© 2025 Fiberama All Rights Reserved.
